Implementing QR Codes in W3C VC and OA Documents
This documentation explains how to implement QR codes in W3C Verifiable Credentials and OpenAttestation documents. QR codes provide a convenient way to access and verify documents by allowing users to scan them with mobile devices, making document verification more accessible and user-friendly.
QR Code URL Structure and Payload Schema
QR codes in TradeTrust documents follow a standard URL structure with an encoded JSON payload using the query parameter q:
https://actions.tradetrust.io?q=<encoded_payload>
The q parameter is critical - it identifies the request as a document verification action. The verification portal specifically looks for this parameter to extract and process the encoded document data.
The encoded payload is a URL-safe string created by using encodeURIComponent(JSON.stringify(payload)), where the payload follows this schema:
| Field | Type | Description | Requirement |
|---|---|---|---|
type | string | Must be "DOCUMENT" | Required |
payload.uri | string | URL where document is hosted | Required |
payload.key | string | Encryption key | Optional |
payload.permittedActions | string[] | Allowed actions (e.g., ["STORE"]) | Optional |
payload.redirect | string | Redirect URL after verification | Optional |
payload.chainId | string | Blockchain network ID | Optional (Required for Transferable Documents) |
When scanned, this QR code will direct users to the verification portal where the document is retrieved from the specified URI, decrypted if necessary, and verified.
QR Code Implementation for Different Document Types
W3C Verifiable Credentials
For W3C Verifiable Credentials, you need to add a qrCode property to your credential with the following structure:
{
  "@context": [
    "https://www.w3.org/ns/credentials/v2",
    "https://w3id.org/security/data-integrity/v2",
    "https://trustvc.io/context/bill-of-lading-carrier.json",
    "https://trustvc.io/context/qrcode-context.json" // Required for QR code support
  ],
  "type": ["VerifiableCredential"],
  "qrCode": {
    "type": "TrustVCQRCode",
    "uri": "https://actions.tradetrust.io?q=%7B%22type%22%3A%22DOCUMENT%22%2C%22payload%22%3A%7B%22uri%22%3A%22https%3A%2F%2Fexample.com%2Fdocuments%2F123%22%2C%22key%22%3A%22abcdef1234567890%22%2C%22permittedActions%22%3A%5B%22STORE%22%5D%2C%22redirect%22%3A%22https%3A%2F%2Ftradetrust.io%2F%22%2C%22chainId%22%3A%22101010%22%7D%7D"
  },
  // Other credential properties
}
Note: Make sure to include the qrcode-context.json in your @context array to properly define the QR code schema.
OpenAttestation Documents
For OpenAttestation documents, QR codes are implemented in the document's links property:
- In OA v2: via
data.links.self.href
View OA v2 Example
Creating the QR Code URL
The URL in the QR code is generated by encoding the payload object:
const payload = {
  type: "DOCUMENT",
  payload: {
    uri: "https://example.com/documents/123",
    key: "abcdef1234567890",
    permittedActions: ["STORE"],
    redirect: "https://tradetrust.io/",
    chainId: "101010"
  }
};

const qrCodeUrl = `https://actions.tradetrust.io?q=${encodeURIComponent(JSON.stringify(payload))}`;
Security Considerations
Document Encryption
Since documents referenced by QR codes need to be publicly accessible, it's recommended to encrypt them. The TradeTrust system supports the oa-encryption library for this purpose:
- Encrypt the document:
const encryptedContent = {
  cipherText: "encrypted_document_content",
  iv: "initialization_vector",
  tag: "authentication_tag",
  key: "encryption_key",
  type: "OPEN-ATTESTATION-TYPE-1"
};
-
Upload the encrypted content without the key to a publicly accessible location (e.g., S3 bucket).
-
Include the URI to the encrypted content and the key in the QR code payload:
const payload = {
  type: "DOCUMENT",
  payload: {
    uri: "https://storage.example.com/encrypted-document-123",
    key: encryptedContent.key
  }
};
Cross-Origin Resource Sharing (CORS)
If you're hosting documents on a custom backend, ensure you've configured CORS to allow requests from TradeTrust domains:
Access-Control-Allow-Origin: *.tradetrust.io
Custom URL Redirection
Instead of directly using the ref.tradetrust.io URL, you can implement a custom reverse proxy to handle QR code redirection:
-
Deploy your own redirect service based on TradeTrust Actions.
-
Configure the service to whitelist allowed redirect domains.
-
Use your custom domain in the QR code URL:
https://actions.yourdomain.com?q=<encoded_payload>
How TradeTrust Renders QR Codes
When a TradeTrust-compatible document with a QR code is loaded, the TradeTrust website:
-
When the QR code is scanned, the encoded URL is opened, which redirects to TradeTrust with the document URI.
-
Extracts the QR code URL using the
getQRCodeLinkfunction, which checks for:qrCode.uriin W3C VC documentslinks.self.hrefin OA v2 documents
-
TradeTrust then downloads the document from the specified URI, decrypting it if necessary.
-
Renders the URL as a scannable QR code.
Testing Your QR Code Implementation
To test if your QR code implementation is working correctly:
- Create a document with a QR code.
- Host the document at a publicly accessible URL.
- Upload your document to https://dev.tradetrust.io/ / https://ref.tradetrust.io/.
- Verify that the QR code icon appears in the document utility bar.
- Click the QR code icon and scan it with a mobile device.
- Confirm that scanning the QR code successfully redirects to TradeTrust and loads the document.
By following these guidelines, you can successfully implement QR codes in your W3C VC and OpenAttestation documents, making them more accessible and easier to verify.
Implementation Example: Using TradeTrust Functions and Actions
This section provides a complete example of implementing QR codes using TradeTrust's reference implementations.
TradeTrust Functions
Prerequisite: Netlify functions.
TradeTrust functions is built with Netlify functions. TradeTrust provides a set of API endpoints for demonstration purposes only. Essentially you should have an endpoint service yourself to store your documents so to facilitate rendering of QR code in your web application later on.
Setting up TradeTrust Functions
Let's go through the steps:
- Sign up an account with Netlify.
- If you need document storage service, sign up an account with AWS. Otherwise, this step can be skipped. Create an s3 bucket on AWS. Create access key ID and secret access key to access this resource. Take note of the bucket name, ID and secrets, we'll need them later.
- Fork tradetrust-functions repo on your github. Make sure to spin up a netlify site connected to the forked github repo.
- You should have a random site name allocated to your netlify site. You can edit site name to whichever name you want. For our example, we have renamed it to
tradetrust-functions.netlify.app.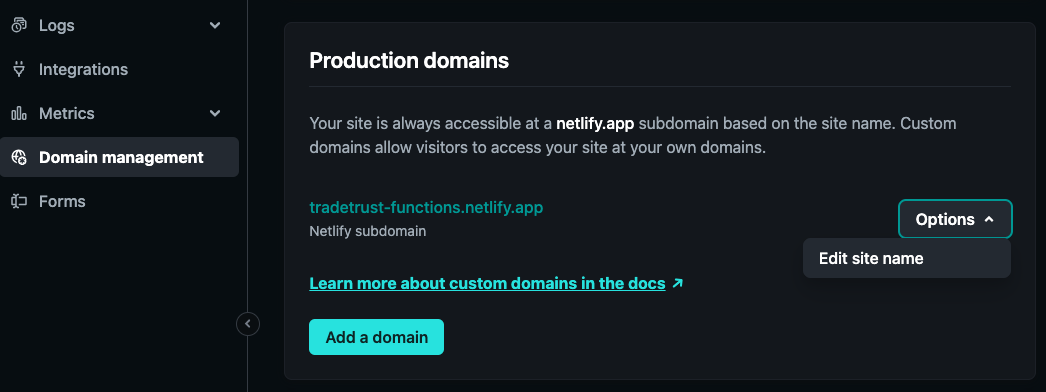
- Populate your environment variables on netlify site settings.
API_KEY= Can be anything.TT_AWS_BUCKET_NAME= Your AWS bucket name resource. (For document storage service)TT_STORAGE_AWS_ACCESS_KEY_ID= Your AWS access key ID. (For document storage service)TT_STORAGE_AWS_SECRET_ACCESS_KEY= Your AWS secret access key. (For document storage service)
- Hit deploy site on netlify dashboard and your API endpoints should be up. They are accessible at:
- https://<YOUR_RENAMED_NETLIFY_SITENAME>/.netlify/functions/verify/
- https://<YOUR_RENAMED_NETLIFY_SITENAME>/.netlify/functions/storage/
Document Storage
For our reference implementation of document storage service, it does the following:
- Encrypts a document, returning the
keyamong other fields. - Only neccessary fields are uploaded and stored in Amazon s3 bucket, without
key. keyis later prepared into document'slinks.self.hreffield, before it gets wrapped and issued.- A decoded example of
links.self.href(action url) value looks like this:
{
  "type":"DOCUMENT",
  "payload": {
    "uri":"https://tradetrust-functions.netlify.app/.netlify/functions/storage/95524c85-c1b4-44e3-ad91-3971f90e43cb","key":"1a8d6113d08210a2dbb91a3240216eefcf0de7601d87264ac2dd831c19853547",
    "permittedActions":["STORE"],
    "redirect":"https://dev.tradetrust.io/"
  }
}
key1a8d6... will be then be used to decrypt the document aturiwith 95524... on TradeTrust web application end.
Note that the
keyvalue is up to integrators on how it should be managed. Do note that the process of whether to encrypt your document is at your discretion.
Preparing the QR Code URL
The QR code URL typically follows this format: https://actions.tradetrust.io?q={encodedPayload}
Where:
actions.tradetrust.iois TradeTrust's action handler service?q=is the query parameter that contains the encoded payload{encodedPayload}is a URL-encoded JSON object containing document access information
Follow these steps to construct your QR code URL:
- Create a JSON object containing the document information:
const payload = {
  type: "DOCUMENT",
  payload: {
    uri: "https://your-storage-service.com/document-id", // URL where document is stored
    key: "your-encryption-key", // Encryption key if the document is encrypted
    permittedActions: ["STORE"], // Actions allowed with this document
    redirect: "https://tradetrust.io/", // Optional: Redirect URL after action
    chainId: "101010" // Optional: Blockchain network ID for NFTs
  }
};
- Convert the payload to a JSON string, then URL-encode it:
const jsonString = JSON.stringify(payload);
const encodedPayload = encodeURIComponent(jsonString);
- Construct the final QR code URL:
const qrCodeUrl = `https://actions.tradetrust.io?q=${encodedPayload}`;
About TradeTrust Actions
actions.tradetrust.io acts as a reverse proxy for document handling. When a QR code containing this URL is scanned:
- It redirects users to the TradeTrust web application with the document information
- The TradeTrust web application then fetches and verifies the document
You can also set up your own custom action handler by forking the TradeTrust Actions repository and deploying it to your own infrastructure.
This provides several benefits:
- Custom domain for your QR codes
- Ability to add custom actions and business logic
- Control over redirection behavior
- Analytics tracking for QR code scans
TradeTrust Web Application
Within our TradeTrust web application, you can setup the QRCode component as per shown below:
import QRCode, { ImageSettings } from "qrcode.react";

<QRCode value={qrcodeUrl} level="Q" size={200} bgColor="#FFFFFF" fgColor="#000000" imageSettings={imageSettings} />;
Refer to the actual reference here if you need more help.
QR Image
For QR code image generation, we are using this library called qrcode.react. The QR image holds information of just an URL. In our case, the QR image refers to links.self.href in the document.
Upon scanning the QR code, users will redirect to application end to handle the document rendering. Meanwhile, this is also the point where the key value will be used to decrypt against s3 bucket stored data to get back our original wrapped + issued document.
Thereafter, the document will be rendered accordingly.
Important: Above are reference implementations, it is up to integrators to decide on their own architecture / flow.